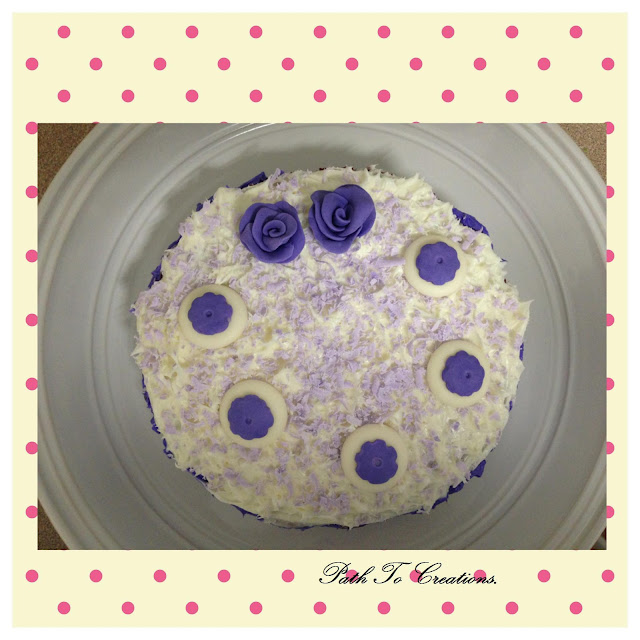
Simple Purple Cake Decoration
It was my wedding anniversary day when i prepared this cake. Roughly i had only 1 hour time to prepare, before starting i was in a big dilemma should i start or not, because it was my special day and i allocated the time according to its preferences, i didn't wanted to waste more than a hour on preparing cake, for me celebration starts with cake cutting, i have to prepare i had no other options( to buy from outside ) because of time constraints, ok took a firm decision without taking any more time, okay i am preparing it.
It was 10am in the morning we were going out by 11.30 i need to finish by this time....i kept the oven to 350 degree preheat- it took 5 minutes, in mean wile i mixed all the ingredients for cake batter and kept in oven, it takes 28 minutes to bake. ok cake will be done any ways, i had many pre preparations to be done before starting decoration. Next i melted the white chocolate it took 45 seconds and mixed the color kept in freezer, all these things took 2 minutes. I had a icing cream left in fridge( which i prepared for snow man cake) took the same and mixed color and kept aside it also took 2 minutes....next was a challenging thing roses i mixed gum paste & color and started doing roses, each roses took 1 minutes, planned to do 10 roses, hoooo this is impossible and stopped to 2. Rest of the cake will look empty so did the simple chocolate buttons all these took 8 minutes. 15 minutes was gone, 12 minutes left for cake to come out of oven, i had no work to pre prepare, in that time i dressed my son...... 28 minutes over cake came out well it was looking gorgeous, it was a big chocolate cake( i will post the recipe soon), to decorate this it takes more time, so i decided to cut the cake into small and i did it, again it was looking gorgeous, kept it in fridge for 10 minutes to cool, thank god after 10 minutes it was cool i started icing it, it took 5 minutes, grated the chocolate took 1 minutes and placed all the toppings on cake it took another 2 minutes and cake is ready.... and i took photos also so that it will be easy for me to explain the methods. Its very simple and takes less time.... I really thanked god that it was ready on time......
.
Step by Step Decoration guide :
 |
| I took a small ball of gum paste, pasted on it and pressed to expand as shown in the above picture |
 |
| For flower design i took a stick and just pressed the edges gently as shown in picture.... |
 |
| I took this picture holding in my hands just to show the sizes of both the toppings ( it will help you to gauge the size ) Tap the icing cream on the cake( used the same technique used in Snow man cake ) . Next grate the chocolate before placing all the toppings. last arrange the toppings according to your wish.. |
 |
| I couldn't take pictures of flower making sure i will show in detail in my future post ....(because my both the hands were mess) |
 | ||||
| Isn't it easy........ Did you people like this cake decoration? let me know by your comments.. |


Comments
Post a Comment